Flashing that good old Android Things IMX7 kit

Before starting this post, I want to make clear a couple of concepts, so that y'all have been warned 😂:
- I didn't come up with anything, I followed a very good GitHub Gist I was shared, in here, I'll be adding my experience hoping to speed up your situation. Huge thanks to the author, I wouldn't have known where to start.
- I'm not (too) opinionated on which OS to use, I use most of them on a daily basis, if one happens to be more handy for a task, that will do. For this task, I used Windows 11.
If you're here, chances are you found one of the development boards that were used to get started with Android Things, and now want to build something with it, so here's the list of things you need to do it:
- uuu flashing tool (available for all major platforms)
- a u-boot image
- a SPL image
- a flashing script
- an OS image
Luckily for us, the first 4 are all packed in a zip file called imx-mfg-uuu-tool-*.zip that can be found here, on the TechNexion website: at the time of writing, I used the imx-mfg-uuu-tool_20200515.zip version, but I believe most of them will do. It's really really important that you take the files (uuu flashing tools, the script and the u-boot and SPL images) from the same archive, as a mismatch in version will result in a failure during flashing.
How do I know it? Because it took me 11 attempts and 3 hours of my time to finally find the answer. On one of the AI bots I didn't want to use.
Anyway, the last item you need is the operating system image. There are 3 available on the TechNexion website: Android, Yocto and Ubuntu. I couldn't get the first to boot, only older versions of the second worked, and all of the latter worked just fine. So I went for the latest version of Ubuntu.
Now, before we flash, we need to extract the image, which is the bigger file in the root of the ZIP. You are looking for a BZ2 file, which is, again an archive. Unzip it and you're good to go.
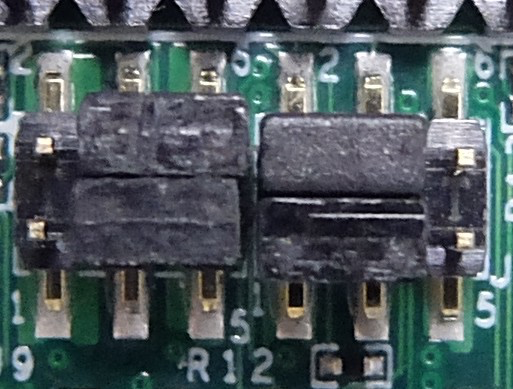
Following the aforementioned guide, I set the pins to download mode:

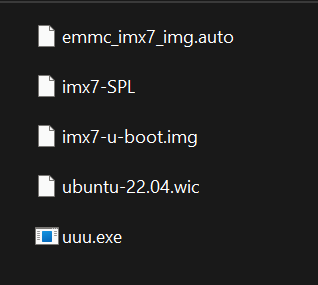
and connected the device to my Windows 11 machine with a USB-A to USB-C data cable. I used the script for the multiboard to flash the system, and for convenience I placed them all in the same directory:

and run the following command through a PowerShell:
.\uuu.exe -b .\emmc_imx7_img.auto .\imx7-SPL .\imx7-u-boot.img .\pico-imx7_pico-pi_yocto-4.2-qt6_qca9377_lcd-800x480_20240820.wic
Waited a minute and got a success message. If you get a failure, double-check that you picked the 4 files from the same archive.
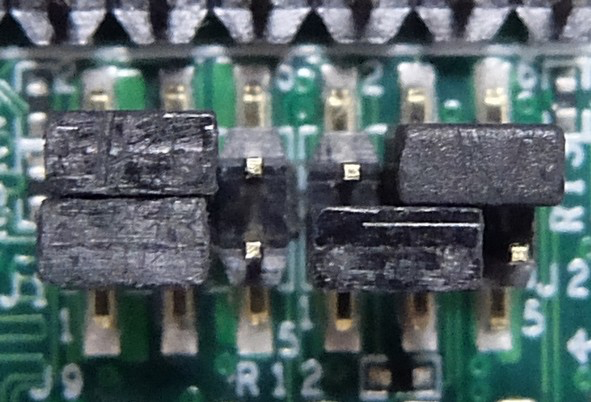
Once the flashing was completed, I removed the cable and set the pin back to eMMC mode:

Now, you can assemble everything and enjoy your new Ubuntu install.
If you want to go fancy and build a case for it, there is this nice one I printed myself as well, available for free on Thingiverse.

